
Clients often sit across from me at their cramped, outdated kitchen islands, holding a Pinterest board full of sprawling chef’s kitchens, and ask what we can do with $3,000.
I have been designing and renovating compact residential spaces since 2017, and I can tell you that a massive budget is not a prerequisite for beautiful design. You do not need to tear down walls or move plumbing lines to radically change how your room feels and functions.
Finding reliable small kitchen renovation ideas on a budget requires ruthless prioritization. You must separate the upgrades that add genuine visual value from the expensive structural changes that drain your bank account before the paint even dries.
My approach focuses on specific, tactical changes: working with existing layouts, utilizing high-performance surface treatments, and understanding the order of operations so you avoid ruining new floors with runaway paint.
Here is exactly how I approach a low-cost, high-impact kitchen refresh, including the specific materials I specify for my clients and the common traps that lead to wasted money.
The Order of Operations for a Budget Kitchen
Before buying a single piece of hardware, you must finalize your sequence. I frequently see homeowners install a beautiful new backsplash only to realize they want to paint their cabinets three weeks later. They inevitably drip primer onto their new grout.
If you plan to execute multiple small kitchen renovation ideas on a budget, follow this specific timeline to protect your investments:
-
Demolition and Prep: Remove old hardware, take down unwanted upper cabinets, and patch drywall.
-
Painting: Ceilings first, then walls, then cabinets.
-
Countertops: Install new surfaces or apply treatments to existing ones.
-
Backsplash: Tile work is messy. Do this after counters are set so you have a perfectly straight bottom edge to caulk against.
-
Lighting: Swap fixtures.
-
Hardware and Finishing: Install pulls, knobs, and open shelving brackets.
High-Impact Upgrades That Keep Costs Low
The Reality of Cabinet Resurfacing
Replacing cabinets in a small kitchen easily eats up $5,000 to $10,000. Painting them yourself costs about $150 in materials and a weekend of intense labor. But slapping latex wall paint onto greasy oak doors guarantees chipping within a month.
You need a specific chemical sequence for cabinet paint to survive daily wear and tear. First, scrub every surface with a TSP (Trisodium Phosphate) degreaser. Kitchen cabinets harbor invisible layers of cooking oils that repel paint. Next, sand lightly with 220-grit sandpaper just to break the existing factory seal.
For the primer, I rely on a shellac-based product like B-I-N Advanced Synthetic Shellac. It prevents old wood tannins from bleeding through light paint colors. Finally, use a urethane alkyd enamel for your topcoats. Manufacturers like Benjamin Moore engineer these specific enamels to cure to a hard, furniture-like finish. It takes up to thirty days to fully cure, so treat the doors gently during that first month.
Strategic Backsplash Installations
A backsplash acts as the focal point in a compact layout because it sits exactly at eye level. Tiling a small space is surprisingly affordable because the square footage is minimal. A standard galley kitchen might only require 25 to 30 square feet of tile.
Basic ceramic subway tile costs around $2 to $3 per square foot at big box stores. You can make this budget material look highly custom through your grout choice and layout.
Instead of the standard horizontal brick pattern, try stacking the tiles vertically. Vertical stacking draws the eye upward, making standard eight-foot ceilings feel taller.
Pairing inexpensive white tile with a medium-gray grout offers a high-contrast, modern aesthetic while practically hiding cooking splatters. If you have zero tile experience, consider beadboard paneling.
You can buy 4×8 foot sheets of moisture-resistant beadboard, cut it to fit the 18-inch gap between your counters and upper cabinets, and paint it a washable semi-gloss. It provides a charming cottage aesthetic for a fraction of the cost and labor of tile.
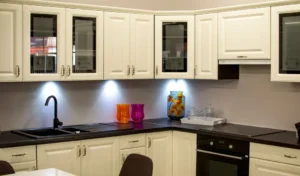
Lighting Upgrades Without an Electrician
Rewiring a kitchen requires pulling permits and hiring a licensed electrician, which easily costs hundreds of dollars just for the labor call-out. You can bypass this entirely with strategic, plug-in, and battery-operated lighting solutions.
Under-cabinet lighting instantly makes a kitchen look more expensive while vastly improving your prep space. Avoid the cheap, battery-operated puck lights that cast harsh, blue-tinted shadows. Instead, buy plug-in LED light bars. Mount them under the front lip of your upper cabinets to wash the work surface in light.
Pay strict attention to the color temperature. I always specify 3000K (Kelvin) bulbs for kitchens. This provides a warm, inviting glow that remains bright enough for chopping vegetables. Anything lower than 2700K looks too yellow and dingy, while 4000K and above feels like a sterile hospital corridor.
Scaling Your Hardware Properly
Swapping out cabinet knobs and drawer pulls requires nothing more than a screwdriver, making it the easiest physical upgrade on this list. However, people often buy hardware that is disproportionately small for their cabinetry.
A standard mistake is putting tiny, round knobs on heavy pantry doors. You want your hardware to feel substantial in your hand. For drawers wider than 24 inches, use two smaller pulls or one oversized pull (at least 6 inches long) to distribute the pulling force and prevent the drawer glides from warping over time.
Mixing metal finishes gives a room an intentionally designed, layered look. Try pairing unlacquered brass cabinet knobs with a matte black faucet. Unlacquered brass develops a living patina over time, darkening and aging where your hands touch it most, which adds incredible character to a sterile, boxy kitchen.

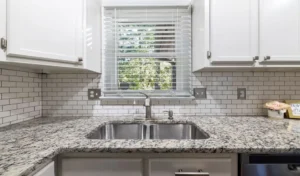
Countertop Alternatives: The Honest Trade-offs
Replacing laminate with stone quartz easily costs $3,000. If your budget is $500, you have to get creative, but you also need realistic expectations about durability.
Many DIY blogs suggest painting your laminate countertops or covering them in contact paper. In my practice, I strongly advise against contact paper around sinks. Water inevitably finds the seams, breaking down the adhesive and creating a peeling, moldy mess within six months.
If you must update existing laminate, a multi-step epoxy coating kit provides a much harder surface. The process creates heavy fumes and requires a respirator, but it hardens into a glossy, water-resistant shell.
A better mid-range option is replacing the counters entirely with solid wood butcher block. You can purchase standard lengths from hardware stores for roughly $200 to $400. Wood adds immense warmth to a small room. The trade-off is maintenance. You must sand and seal the wood with food-safe mineral oil every few months to prevent cracking around the sink area.
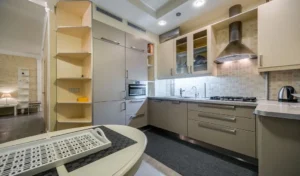
The Open Shelving Debate for Compact Spaces
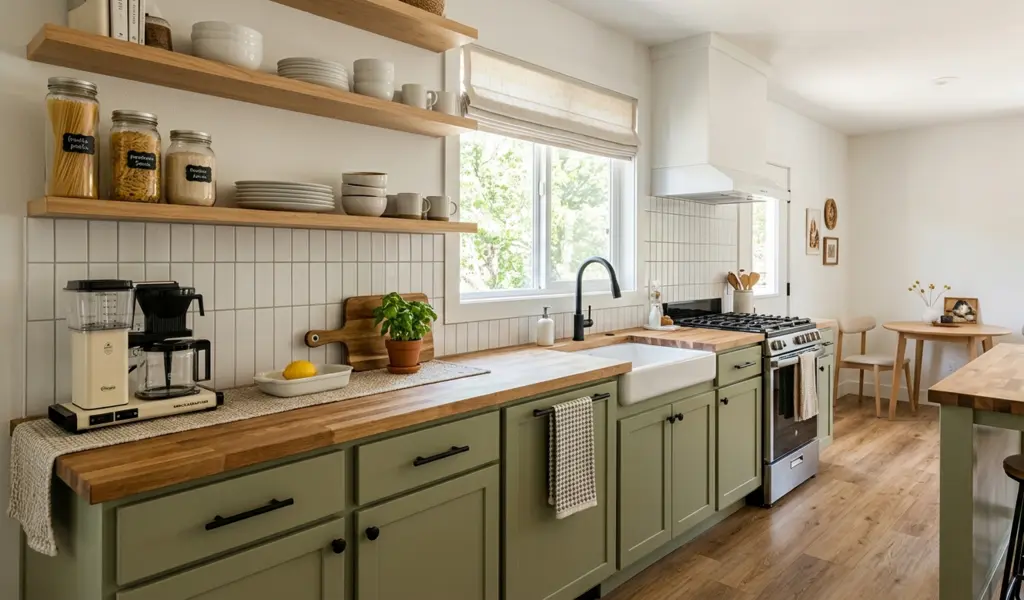
Removing upper cabinets to install open shelving is a polarizing topic. In a tight kitchen, a solid block of dark upper cabinets often makes the room feel like a cave. Taking down just one or two cabinets around a window and replacing them with floating shelves instantly opens up the sightlines.
However, open shelving forces strict discipline. It only works if you use the shelves for items you wash frequently, like daily drinking glasses and everyday plates. If you use the shelves to store seasonal platters or a collection of random coffee mugs, the grease and dust in the kitchen air will settle on them, creating a sticky coating.
If you choose open shelving, ensure your brackets are anchored directly into the wall studs. Drywall anchors, even heavy-duty ones, will eventually fail under the weight of a stack of ceramic dinner plates. A standard shelf needs to support at least 50 pounds.
Frequently Asked Questions (FAQ)
What is a realistic budget for a cosmetic small kitchen refresh?
If you are doing the labor yourself, keeping your existing appliances, and focusing on paint, new hardware, a basic tile backsplash, and upgraded lighting, you can execute a stunning transformation for $800 to $1,500. Adding butcher block counters pushes that closer to $2,000.
What should I prioritize if I only have $500?
Spend $150 on premium cabinet paint and primer, $150 on substantial new hardware, and $200 on a modern, pull-down kitchen faucet. A high-arc faucet immediately updates the sink area, and fresh cabinet paint alters the entire color palette of the room.
Should I attempt tiling a backsplash myself?
Yes, if you have patience. Subway tile is highly forgiving for beginners. Rent a wet saw from your local hardware store rather than using a manual snap cutter. A wet saw provides clean, precise cuts around electrical outlets. The authoritative guides over at This Old House offer excellent step-by-step videos on mixing thinset mortar to the correct consistency (it should feel like peanut butter).
Do peel-and-stick floor tiles actually hold up in a kitchen?
They work as a temporary, two-to-three-year solution. Kitchens see heavy foot traffic, dropped knives, and spilled water. If water seeps between the seams of peel-and-stick tiles, the adhesive degrades. If you want a budget-friendly floor that lasts a decade, look into click-lock Luxury Vinyl Plank (LVP). It floats right over your ugly existing linoleum, requires no adhesive, and is entirely waterproof.
Renovating a small kitchen requires viewing limitations as design parameters rather than obstacles. By directing your budget toward high-touch surfaces like hardware and prioritizing rigorous prep work for your paint, you can build a space that functions beautifully and respects your bank account. Measure twice, buy the right primer, and tackle the project one weekend at a time.