Best Paint Finish for a Small Bathroom (And Why the Wrong Sheen Ruins It)
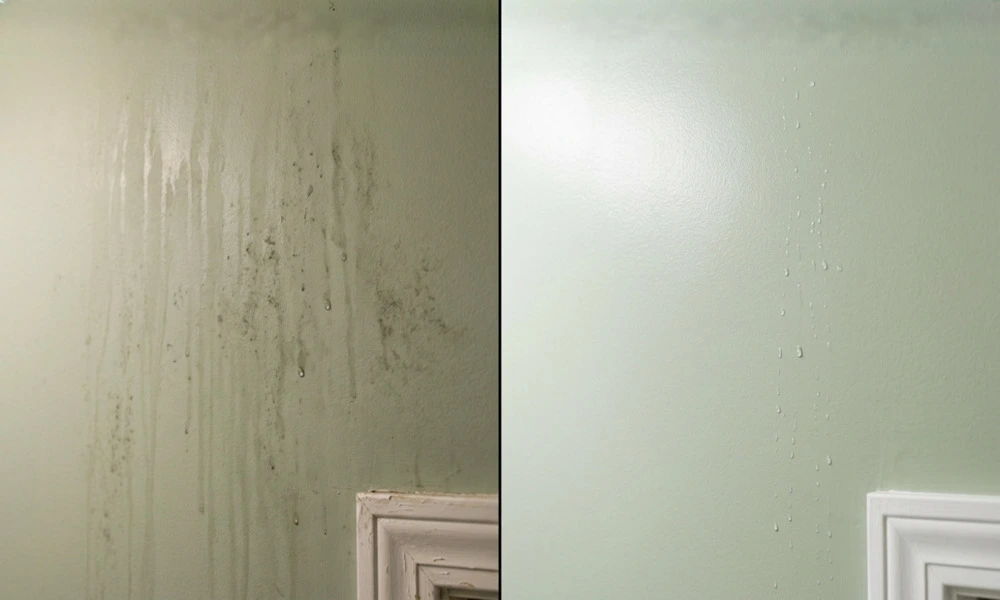
Search “bathroom paint peeling” and thousands of nearly identical complaints turn up. Fresh paint, careful prep, and within a year the ceiling above the shower is bubbling or the wall behind the toilet has gone soft and blotchy. Almost nobody blames the actual cause. They blame the color, repaint the exact same finish in a different shade, and watch it happen again eighteen months later.
There’s a specific kind of frustration in that moment — standing there half-ready for work, catching a mold spot in the ceiling corner you swore you’d already dealt with, knowing you actually spent real money on a “nice” paint last time. That reaction shows up constantly in renovation forums, and it’s almost always followed by the same wrong conclusion: that the color or the brand let them down.
The color was never the problem. The sheen was.
Paint sheen — matte, eggshell, satin, semi-gloss, gloss — decides how much water the paint film actually lets in, and a bathroom is the one room in the house where that number matters more than anything else on the label. Get the sheen wrong and even a two-hundred-dollar designer color fails the same way a bargain-bin can does. Get it right and a ten-dollar sample from the hardware store outlasts most kitchens.
I’m not a painter or a contractor. What I do have is a research background — a Computer Science degree that never touched interior design, but did teach me to chase the actual mechanism behind a problem instead of the surface-level explanation everyone repeats. When I started pulling apart why bathroom paint fails, the color kept coming up as the assumed culprit in forum threads and comment sections. The chemistry told a completely different story, and that gap between what people assume and what’s actually happening is the entire reason this guide exists.
This is specifically about finding the best paint finish for a small bathroom, not which color to pick — that’s a separate decision, and a much less consequential one than most people assume.
A quick way to check if this is actually the problem in an existing bathroom: look closely at whichever wall gets hit by shower steam most directly. If the paint there looks slightly duller, softer, or has a faint texture change compared to the rest of the room, that’s early-stage film breakdown — the sheen giving up before anything visibly peels. Catching it at that stage means a repaint. Catching it two years later usually means dealing with actual mold underneath first.
Why Bathroom Paint Actually Fails
People tend to assume paint just “wears out” the same way anywhere in the house, and that assumption is exactly what leads them back to the paint aisle for another can of the same finish. What’s actually happening in a bathroom is a different mechanism entirely, and it’s worth slowing down on before touching a brush.
Every paint film is porous to some degree. The question is how porous, and that comes down to sheen, not color pigment.
A flat or matte finish has almost no reflective coating — it’s mostly raw pigment sitting on the surface, which is exactly why it looks so smooth and non-reflective. That same lack of film density is what lets water vapor soak in instead of beading off. In a room with a hot shower running daily, that difference shows up fast.
Higher-sheen finishes work the opposite way. Semi-gloss and gloss build a tighter, denser film as they cure. Less surface area for water to grip, less time spent wet, and a much easier wipe-down when soap scum or condensation builds up. That’s the entire mechanism behind “use semi-gloss in bathrooms” — it was never really about looks.
There’s a second factor that rarely gets mentioned alongside sheen: how the paint was applied matters almost as much as which finish got chosen. Two thin, fully-cured coats build a denser, more even film than one thick coat rushed onto the wall. A rushed single coat can leave the exact same semi-gloss paint performing closer to an eggshell in real-world moisture resistance, simply because the film never built up to its intended thickness. Sheen on the label and sheen actually on the wall aren’t always the same thing.
Different Sheen for Different Surfaces
The most common mistake isn’t picking the wrong sheen. It’s picking one sheen and using it everywhere.
Walls get the most airflow and the least direct water contact in most layouts, so satin has become the standard default for bathroom walls going into 2026 — enough sheen to resist moisture and wipe clean, without the harsher shine of semi-gloss bouncing light across every imperfection in the drywall.
The splash zone — the wall directly behind the sink, the section around the tub, anywhere water regularly lands — needs to go a step up to semi-gloss. This is the part most people skip, painting the whole room in one flat sheen and wondering why only one section starts failing first.
Trim, cabinets, and doors get handled hardest and touched constantly with wet hands, so semi-gloss or full gloss earns its place here regardless of what’s on the walls.
Ceilings are where the old advice gets murkier, and it’s worth slowing down on this one.
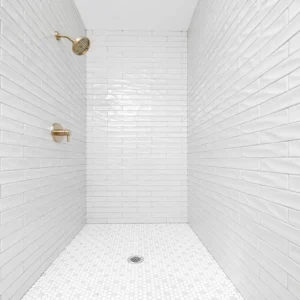
The Matte Ceiling Rule Everyone Repeats — and Why It’s Half-Outdated
For years the standard advice was simple: never use flat or matte paint in a bathroom, full stop. That advice made sense when it was written, and most of it still holds — a generic builder-grade flat paint really will fail on a bathroom ceiling within a year or two.
What’s changed is that a handful of manufacturers now build antimicrobial, moisture-resistant matte formulas specifically for this problem. Benjamin Moore’s Aura Bath & Spa line is the one that keeps coming up across paint-industry sources — a matte finish engineered with a proprietary film technology that resists burnishing and holds color accuracy even in steam-heavy rooms, which is exactly the failure mode that made matte a bad idea in the first place.
The rule isn’t “never use matte in a bathroom” anymore. It’s “never use a generic matte in a bathroom” — a bathroom-specific matte, formulated for moisture, is a completely different product wearing the same finish name. If a ceiling genuinely needs that soft, non-reflective look, it’s now achievable without the old trade-off. Most people never learn this distinction exists, because most articles on this topic are still repeating the blanket rule from a decade ago.
Cost is part of why the old rule stuck around so long, honestly. A bathroom-specific matte with this kind of engineering costs meaningfully more than a standard flat paint from the same brand — often close to what a premium satin runs. For a ceiling that’s genuinely visible and matters to the room’s look, that premium can be worth paying. For a ceiling nobody really looks at, a standard mold-resistant satin does the job for less, and the difference is invisible from floor level anyway.
What “Mold-Resistant” Actually Means
The words “mold-resistant” on a paint can aren’t a marketing flourish, though it’s easy to assume they are after seeing the term slapped on everything from shower curtains to caulk. They describe a specific formulation difference, and it’s worth understanding what’s actually happening on the wall — especially given how often people pay extra for “mold-resistant” paint and still end up right back where they started a year later, usually because the real problem was never the paint in the first place.
Manufacturers grind biocides directly into the paint during production — commonly a compound called IPBC, or sometimes zinc-based additives — rather than relying on a mildewcide stirred in after the fact at the hardware store. Those store-bought additive bottles exist and do something, but they’re meaningfully weaker than what’s built into a purpose-made formula from the start.
The protection works two separate ways at once. A denser paint film physically absorbs less water, so a mold spore landing on the surface has less moisture available to start growing. And the fungicide embedded in that film actively kills spores that do land there, before they can establish a colony. Two different mechanisms, stacked on top of each other, which is why a genuinely mold-resistant paint outperforms a regular one by more than the name alone would suggest.
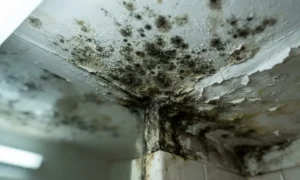
One thing this can’t do: fix a wall that already has active mold growing on it. No mold-resistant topcoat kills what’s already there — painting over an existing colony just seals it behind a fresh film, where it keeps growing, invisibly, until the paint starts failing again.
There’s a specific sequence worth writing down before starting, since skipping a step is the most common reason a “fix” doesn’t actually hold: spray a diluted bleach solution (roughly one cup of bleach per gallon of water) directly onto the affected area, let it sit for about fifteen minutes, scrub with a stiff brush, then rinse. After that, the wall needs a full 24 to 48 hours to dry completely — genuinely dry, not just surface-dry — before any primer goes on. Priming over a damp wall traps that moisture behind the new film, which defeats the entire point of doing the prep work in the first place.
If mold covers more than roughly ten square feet, this stops being a paint-prep job and becomes a job for professional remediation first. That’s not a small-bathroom-specific number — it’s the general threshold most guidance points to before DIY treatment stops being the safer option.
How Sheen Actually Makes a Small Bathroom Feel Bigger
This is the one place sheen and “feels bigger” genuinely connect, and it has nothing to do with which color gets chosen.
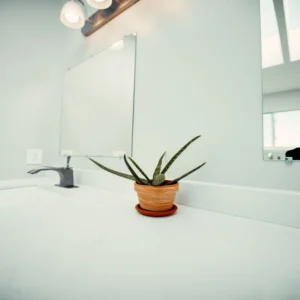
A higher-sheen finish reflects more of whatever light is already in the room — daylight through a window, a vanity bulb, an overhead fixture — and bounces it back across the space instead of absorbing it into a flat surface. In a small, often windowless bathroom, that reflected light does real, measurable work toward making the room feel less closed-in.
This is a separate mechanism from paint color entirely. A pale wall in a flat finish can still read as dull and closed-off, because the color is light but the surface isn’t bouncing anything back. A slightly deeper color in satin or semi-gloss can end up feeling brighter in practice, because the sheen is actually doing the reflective work the flat paint wasn’t built to do. Sheen and color solve two different problems, and treating them as one decision is where a lot of small-bathroom paint jobs go wrong before they even start.
Paint stores can pull up the light reflectance value, or LRV, for most colors — a number from 0 to 100 that measures how much light a color bounces back regardless of sheen. Pairing a higher LRV color with a higher-sheen finish stacks both effects together, which is the actual combination behind a small bathroom that reads as noticeably brighter than its square footage suggests. Either one alone helps a little. Both together is where the real difference shows up.
If the Wall Is Already a Problem
None of this matters if the surface underneath isn’t actually ready for paint, and this is the step most DIY bathroom repaints skip entirely — usually because nobody wants to deal with an existing mold spot when there’s a fresh can of paint sitting right there, ready to just cover it up and move on.
A wall with existing mold needs to be treated before anything goes on top of it — a diluted bleach solution, a full dry-out period, and a stain-blocking primer, in that specific order. Skipping straight to a mold-resistant topcoat without that prep just traps the existing problem under a new layer, and it will find its way back through within a season or two.
“Paint and primer in one” is worth a second look here too. That claim is genuinely true, but only for surfaces that are already sound, clean, and properly scuff-sanded. A bathroom wall that’s had any moisture history, visible mold, or a glossy old oil-based trim underneath doesn’t qualify — it needs a real, separate primer first, whatever the can’s label implies about skipping that step.
Ventilation matters more than any product choice, honestly. Even the best mold-resistant paint is fighting an uphill battle in a bathroom with no working exhaust fan and no window cracked during and after a shower. Paint chemistry can reduce the risk. It can’t replace airflow.

Picking an Actual Product Without Overthinking It
For most small bathrooms, this narrows down faster than the paint aisle makes it feel.
Walls: a satin, mold-resistant interior paint. Benjamin Moore’s Kitchen & Bath line and similar bathroom-specific satins from other major brands are formulated exactly for this, usually self-priming and mildew-resistant out of the can.
Splash zones and trim: step up to semi-gloss in the same product line, so the sheen jump doesn’t come with a jarring finish or brand mismatch.
Ceiling: a standard satin if the ceiling gets real airflow from an exhaust fan, or a purpose-built mold-resistant matte like Aura Bath & Spa if a flatter look is genuinely important and the budget allows for it.
Budget-conscious option: a mold-resistant satin or semi-gloss from a big-box brand — meaningfully cheaper than the premium lines, and still a real formulation difference from a generic flat paint, which is the gap that actually matters.
None of this needs to be complicated by the fifteen finish names printed across different brands’ marketing. Sheen, zone, and whether the can specifically says mold-resistant — that’s the entire decision, once the paint color has already been chosen separately. For the layout side of a small bathroom that makes this kind of upgrade actually worth doing, this small bathroom layout guide covers the fixture and space-planning half of the equation. And if color is still the open question, this color guide picks up right where sheen leaves off.
A bathroom repaint that fails almost never fails because of the color someone picked. It fails because a flat, general-purpose paint got asked to do a job it was never built for, in the one room of the house where that job matters daily. Match the sheen to the surface, treat any existing mold before painting over it, and the color decision becomes the easy part it was always supposed to be.